It should be noted that this guide is intended for Windows XP running an ATi card with HDMI out. Other configurations might work with these instructions, but I can not guarantee this.
Requirements:
- Windows XP.
- Compatible receiver with HDMI input.
- ATi Radeon card with hdmi out (usually a DVI+sound to HDMI adapter)
- The correct ATi HDMI Audio Driver (not Realtek ones) – Link: http://game.amd.com/us-en/drivers_catalyst.aspx?p=xp/hdmiaudio-xp
- AC3Filter – Link: http://ac3filter.net/projects/ac3filter
- Directshow capable media player, such as MPC-HC and Media Portal which will be used in this tutorial.
My specifications (when writing this tutorial):
- Ati 4850
- Windows XP SP3
- Intel Core Duo E8400
- Gigabyte GA-P35C-DS3R Main board
- AC3Filter 1.51a
- Combined Community Codec Pack (latest version includes MPC-HC)
The tutorial
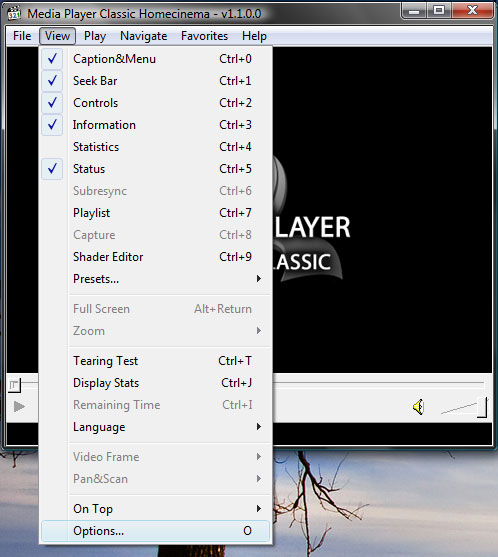
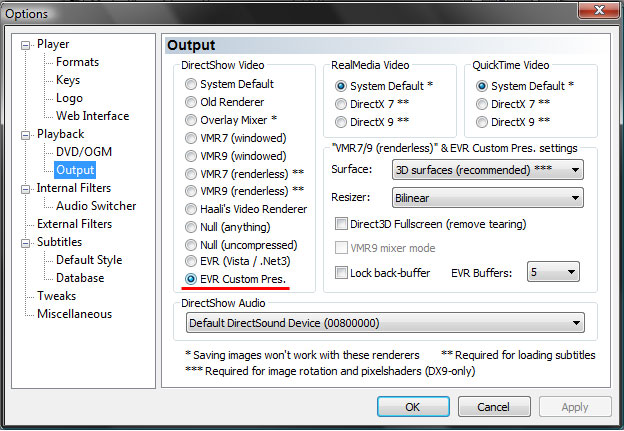
After installing AC3filter and the correct drivers. Open MPC-HC, go to View > Options and select Output.
Important: Under “DirectShow Audio” make sure the right output is selected (not system default), in my case this is “ATI HD rear output”.
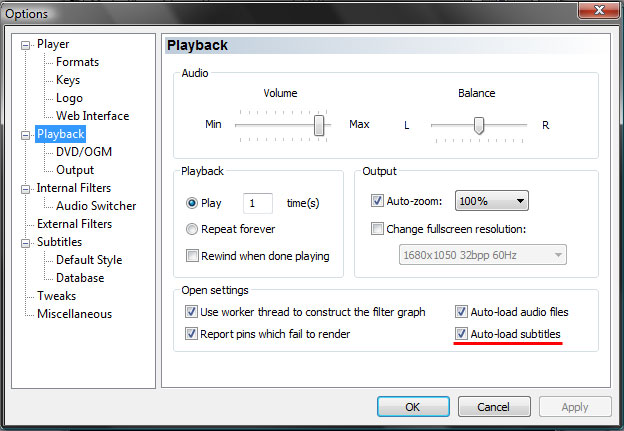
Go to Filter Settings and make sure everything there is unchecked, then continue to Audio Switcher and disable the built in audio switcher.
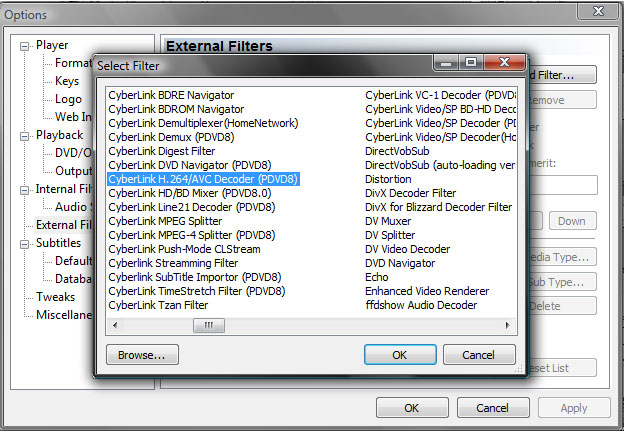
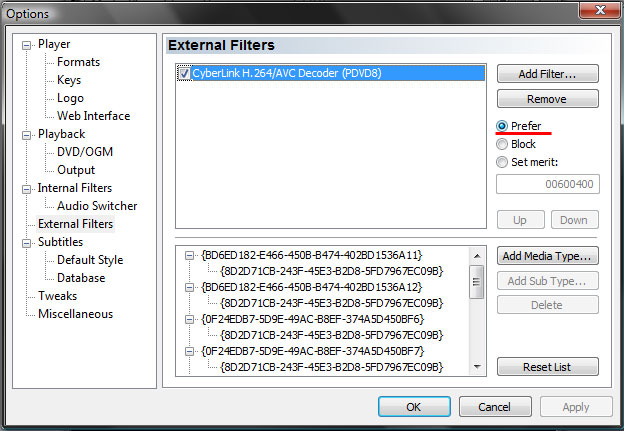
Continue to external filters, choose Add Filter and select AC3Filter, press OK and make sure it is set to prefer.
You can now close Media Player Classic Home Cinema.
AC3Filter Setup
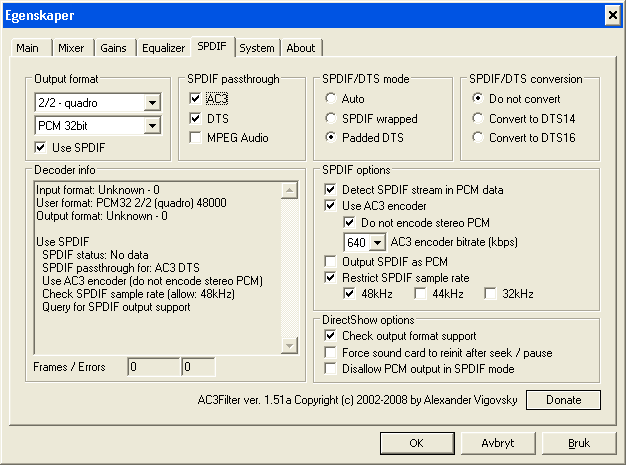
Locate the AC3Filter config in the start menu under Programs. This will bring up the following dialog.
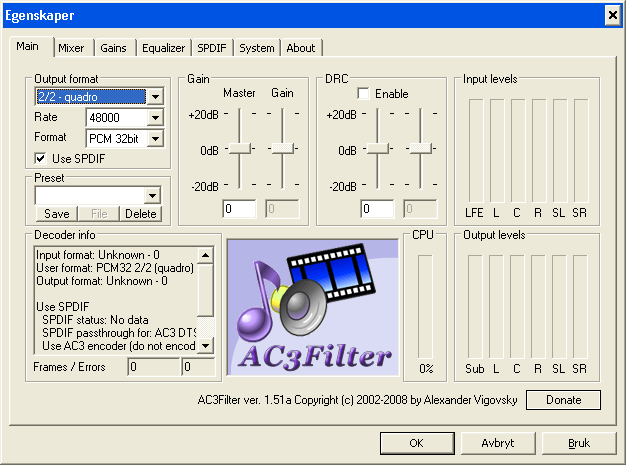
Set “Output format” to something that matches your speaker configuration and is compatible with your receiver.
Continue to the SPDIF tab, and make sure the settings under SPDIF passthrough match the following screenshot.
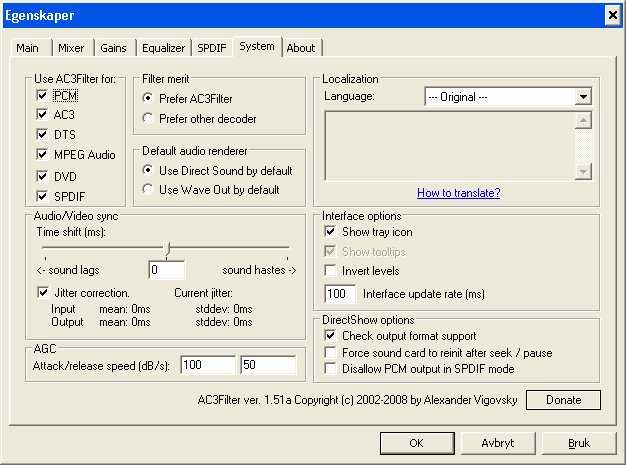
Then continue to the System tab and make sure it matches the following screenshot.
Now press OK to save your options.
Making sure it is working
You should now try playing back a video with AC3 or DTS sound to see if you hear anything, if there is sound playing you should check if digital pass-through is working. This can be done by clicking the AC3Filter icon in the system tray when the movie is playing and see if it says “Passthrough” under “Output format”.
Another way to test this is by adjusting the windows volume. If the volume control doesn’t work and the only way to adjust the volume is on the receiver, then everything is working perfectly.
Setting up Mediaportal with AC3Filter
Mediaportal is an open source media center software for windows. It uses Directshow for media processing and can therefore be used together with AC3Filter.
You can get the newest version from http://www.team-mediaportal.com/.
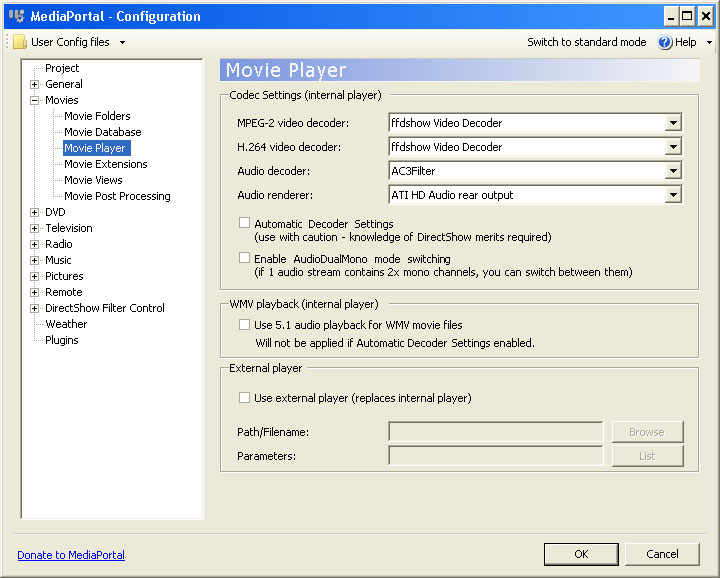
When installed, open Mediaportal Setup and go to Movie Player settings (see screenshot below). Set Audio decoder to AC3Filter and renderer to ATI HD Audio rear ouput.
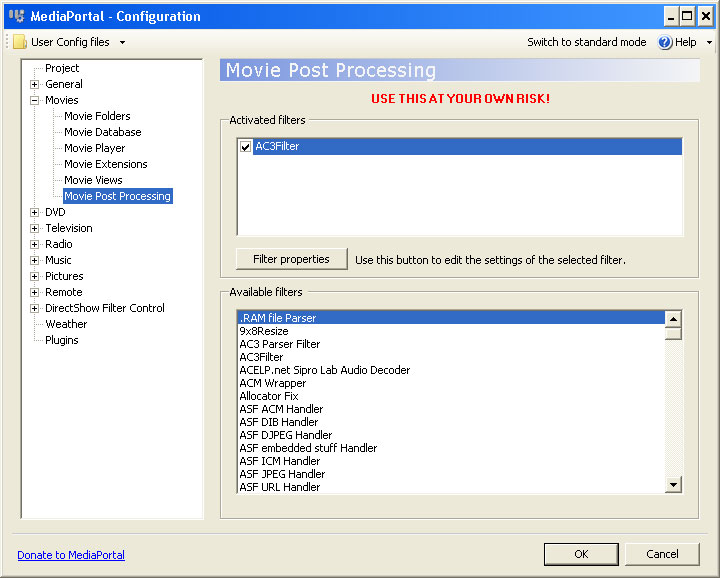
Continue to the Movie Post Processing section and add AC3Filter by double clicking it in the lower pane, make sure the selection box is marked. Press OK to save and start Mediaportal to test. If the only way to control volume level is by using your reciever, then it should be working.
Please give feedback if everything worked, or if you encounter any problems.
